Project 1: Know the Tools
Homework 1: Get to Know Your Tools
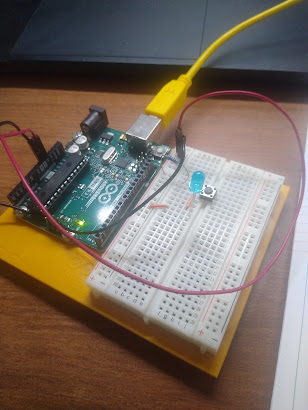
For this homework we actually started by creating a simple circuit so we can apply power to a led.
Here I have the Arduino connected to the breadboard and put in the resistor and the switch for a basic circuit.
After adding more connection wire and the led I have it plugged in to first make sure that the connection is not being made prematurely.
As shown by the picture the simple circuit does work as the led is lit up as I am pushing the button.
Series
Another continuation of this project is to create a series circuit.
After learning the pieces are a pain an the ass to remove without a little to grab them, I set up the series circuit.
With this the led only lights up when both switches are being pressed.
Parallel
The other type of circuit that needed to be constructed is a parallel circuit. We use the parallel so that when any switch is pressed the led will light up.
So this is my basic setup for the parallel circuit. It is a little different than what was shown in the book and that is because I believe they sent me the wrong pieces. The piece that is needed was accidentally the size above it so I had to makeshift the circuit.
As shown from the above pictures when i press either switch it connects the circuit and the led lights up.
Conclusion
This was a great starter to the Arduino. The pieces are and will forever be a pain in the ass to remove from the breadboard.


.jpg)


Comments
Post a Comment